
Do you want to connect your subdomain to Blogger? Yes, it is possible to add your desired subdomain in Blogger and you can keep your main domain or another subdomain with your desired or existing hosting.
Why should you add a subdomain in Blogger?
There are many reasons you should add a subdomain in Blogger.
- Handling Unlimited traffic
- Handle your blog – blog.example.com
- No tension for the bug, renewal, or updates
- Static Website
- Multiple User
- Creating any tool website
- Privacy Policy Page
Did you know there are many websites that connected their subdomain to Blogger?
- ctblog.aaaenos.com – using blogger subdomain to demo their ctblog blogger theme
- en.eatlaza.com – using blogger for their app privacy policy, about us page, contact us page, disclaimer, terms, franchise page, and more.
How can you connect a subdomain to google blogger?
to connect a subdomain to your blogger. you have to follow some steps.
1. Open Blogger.com
Open Blogger.com and create a blog with any name and user name it doesn’t matter still you have to create an account.
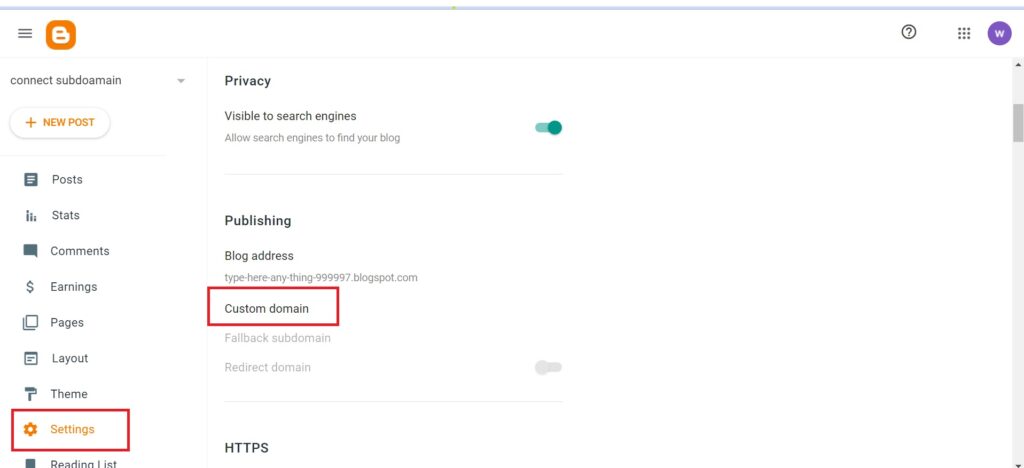
2. go to blogger settings
After saving and successfully creating an account on Blogger. now go to the settings tab and click on ‘Custom Domain‘
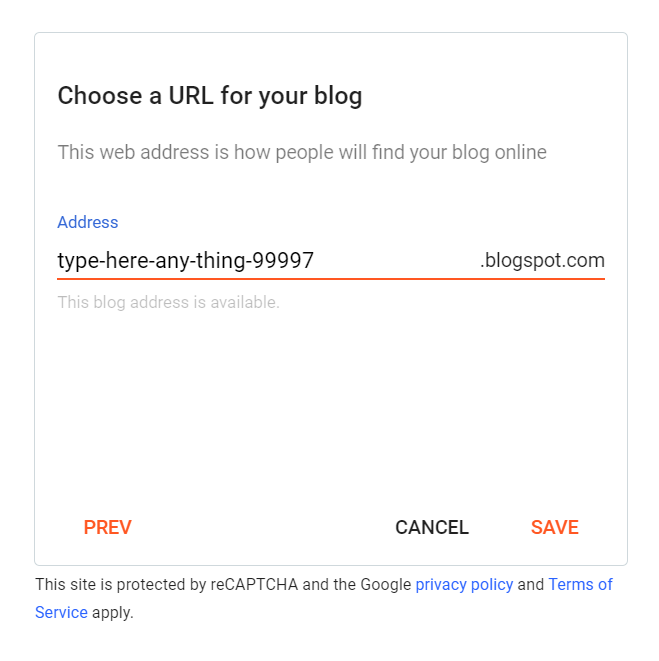
3. Type Your Desired Subdomain word
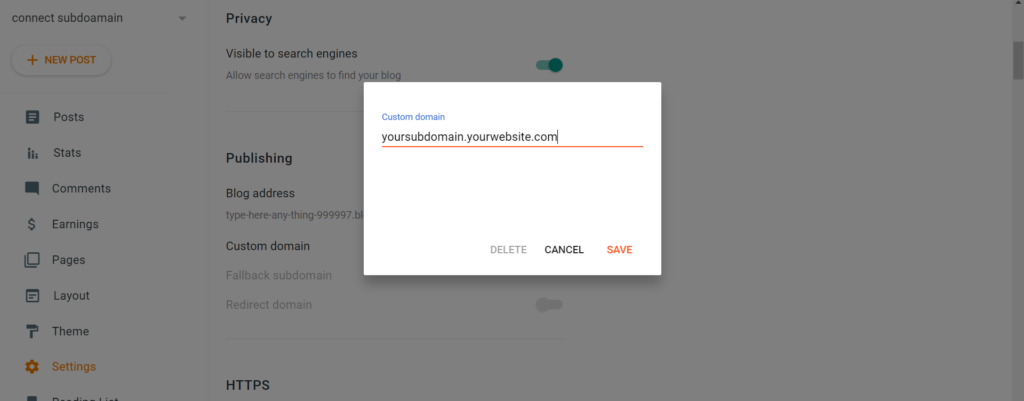
know you will show a pop-up for the custom domain – please type your desired domain with your domain name. suppose your desired subdomain name is ‘yoursubdomain‘ and your registered domain name is ‘yourwebsite.com‘ then type yoursubdomain.yourwebsite.com . in our case, our desired subdomain is: yoursubdomain and our website name is whatbm.com then we will type: yoursubdomain.whatbm.com
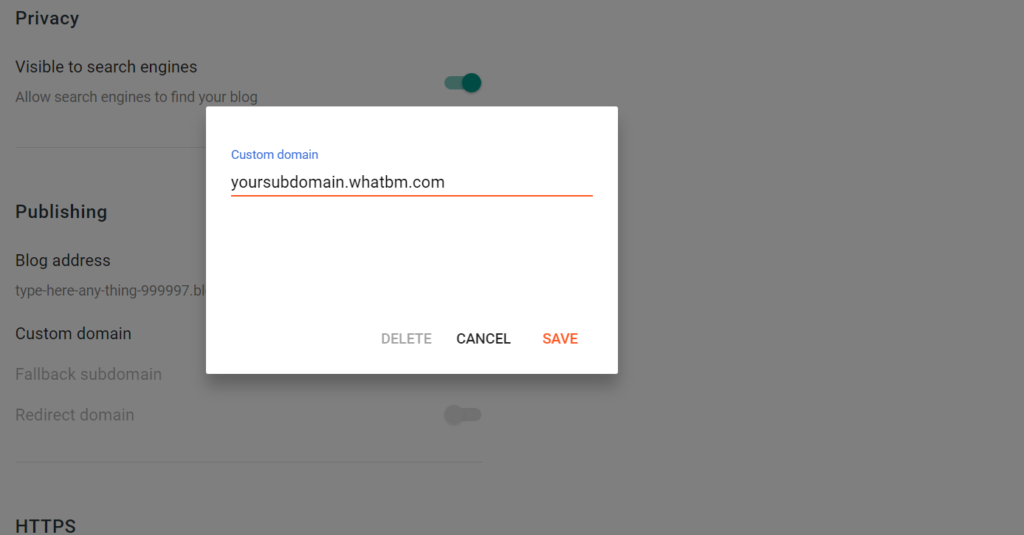
After typing your desired subdomain with your website name now click on save.
4. Copy Both CNAMEs
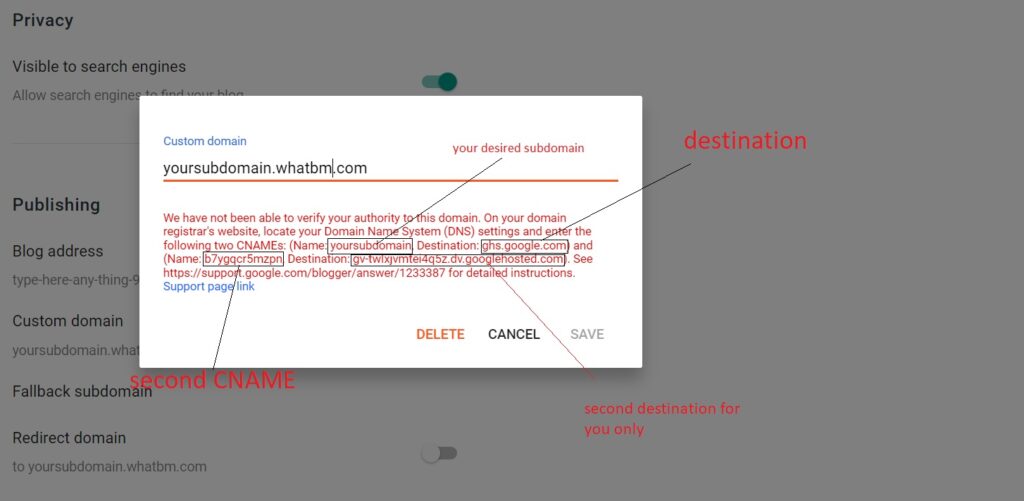
here you will see two CNAMEs with Name and Destinations in our case our first CNAME and Destination are Name: yoursubdomain and Destination: ghs.google.com . and second CNAME and Destination are Name: b7ygqcr5mzpn and Destination: gv-twlxjvmtei4q5z.dv.googlehosted.com
Note: You won’t be able to see if already added any of these CNAMEs.
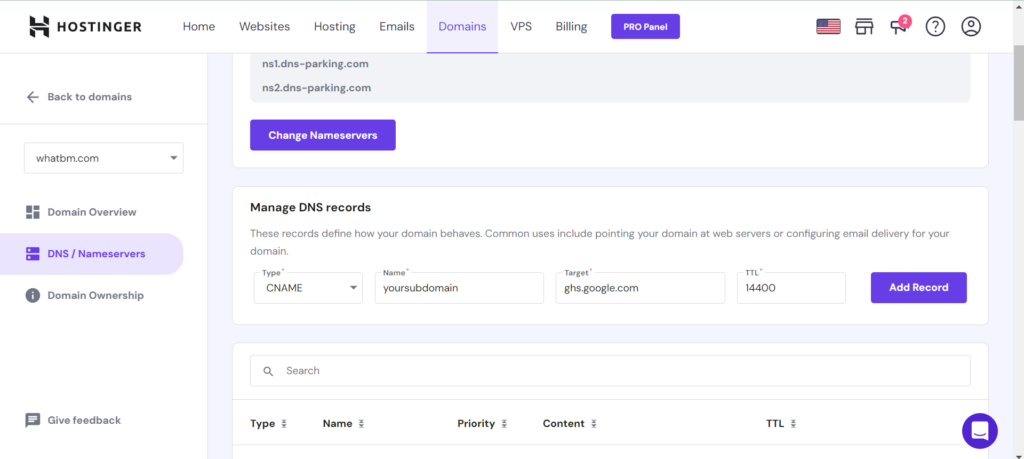
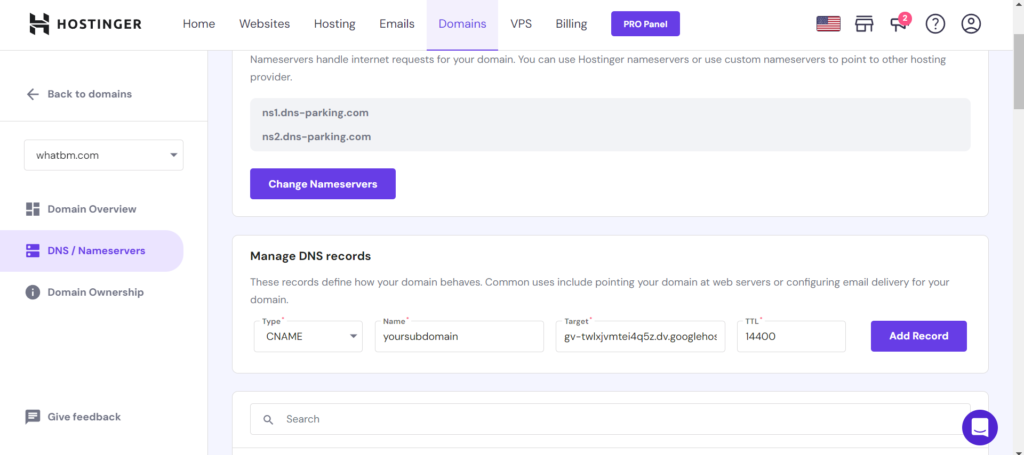
5. Open Your Domain Name Provider Website for Add CNAMEs
Open Your domain provider website where you bought your domain like Hostinger, GoDaddy, Namecheap, Google Domains, or another and go to the DNS section. and add 2 CNAMEs.
1st CNAME – Type = CNAME, Name: yourdomain, Target: ghs.google.com, and another leave default.
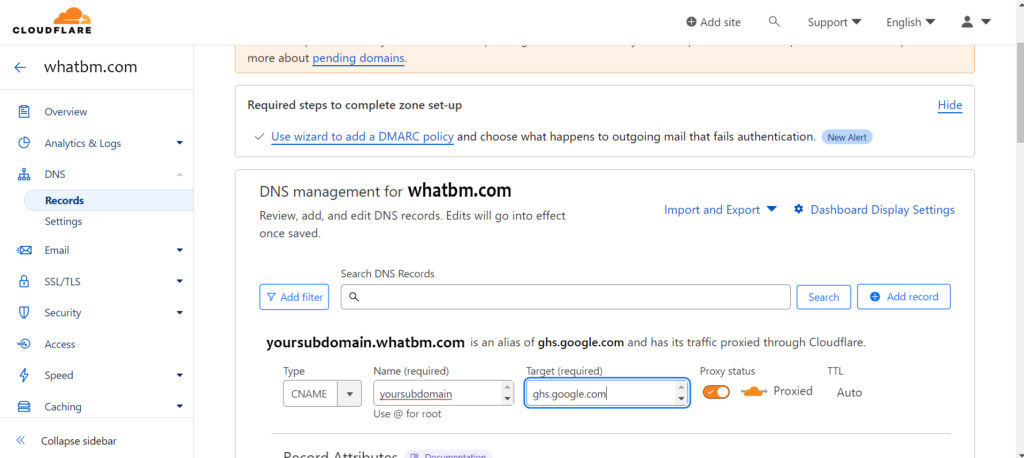
in case you using Cloudflare then go to the Cloudflare website and select your website then DNS.
Note: If your nameserver manage by another platform or Cloudflare then you have to add from there in DNS Section
2nd CNAME Type = CNAME, Name: b7ygqcr5mzpn, Destination: gv-twlxjvmtei4q5z.dv.googlehosted.com
Create DNS in your domain name provider’s website
Create Second CNAME in Cloudflare

You have added successfully now you can add 4 – A records it’s optional for a subdomain.
6. On Https In Blogger
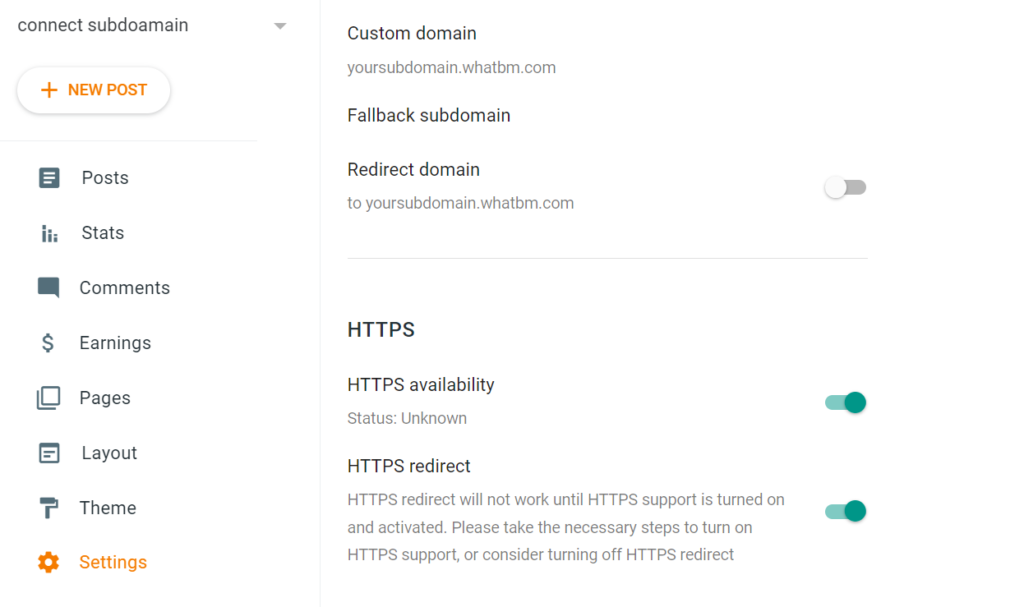
Again go to your blogger settings and on HTTPS second one auto one. it will take some hours to be available.
Note: do not on Redirect Option for a subdomain.
your subdomain has been connected now wait some hours to be fully available with the HTTP protocol.
Bottom Line:
Connecting a subdomain to a blogger is simple but hard when a person doesn’t have knowledge about DNS. but this article is so easy with Images, Fully defined we hope you have successfully added it.